How to calculate the time when to plant a pumpkin for seedlings?
Pumpkin is an unpretentious crop that grows well in different climatic conditions. The vegetable is distinguished by its rich composition and pleasant taste. This makes the orange beauty an irreplaceable assistant for those who care about their health and keep fit. Unsurprisingly, the vegetable is often found in gardeners' plots.
Pumpkin bushes love warmth and sunshine. In temperate climates, the crop is grown mainly in seedlings. In the article we will talk about the nuances of planting pumpkins for seedlings at home and proper cultivation in the open field.
The content of the article
Preparing pumpkin seeds
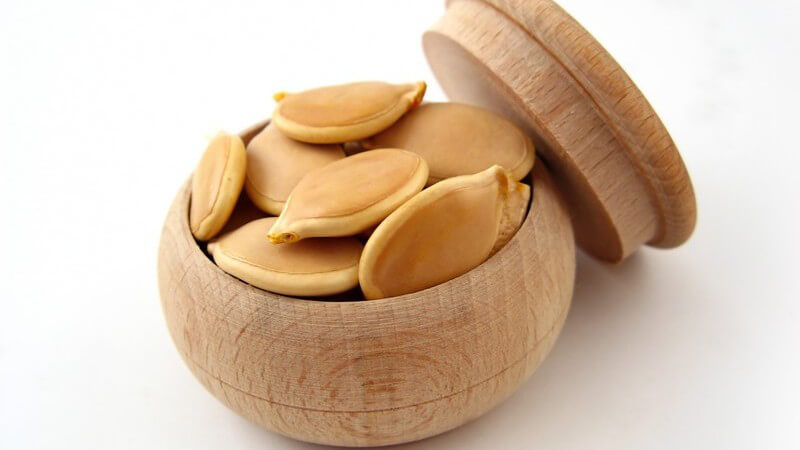
Cultivation begins with close inspection and selection of seed material. They are collected by themselves in advance or bought in specialized stores.
For seedlings, large dense seeds are chosen without damage and signs of disease... Selected specimens are placed in a saline solution, mixed and left for about 10 minutes. The floating seeds are empty, they will not germinate. The grains settled to the bottom are collected, washed with clean water and dried at room temperature.
An important stage in seed preparation is their disinfection... It protects future tender sprouts from fungal and bacterial diseases, the pathogens of which lurk in the seeds themselves and in the soil.
Important! Disinfection is not carried out if it is indicated on the bag with planting material that disinfection has already been carried out, or if the seeds are pelleted.
The grains are disinfected in a 1% solution of potassium permanganate (1 mg per 1 liter of water) for 30 minutes. Then they are washed with clean water and dried.
The preparation Fitosporin is well suited for disinfection. It is effective against fungal and bacterial diseases in all crops. Processing is carried out in accordance with the instructions.
The next stage of preparation is germination, which accelerates the emergence of sprouts. The disinfected material is wrapped in a damp cloth (for example, gauze or cotton pads), placed in a plastic bag, and removed to a warm place. At temperatures from +22 to +27 ° C, seedlings hatch in 2–4 days. In addition to ordinary water, growth stimulants are used ("Epin" or "Zircon").
Some sprout pumpkin seeds in sawdust. To do this, they are poured into a suitable container, poured with boiling water and covered with a lid. After the mass has cooled to room temperature, planting material is added to the mixture and deepened a little. The container is wrapped in a plastic bag and placed in a warm, dark place for 2-3 days until sprouts appear.
Experienced gardeners, in addition to soaking, also harden the seed. The procedure increases the resistance of plants to cold weather and temperature changes. This is especially important for thermophilic varieties of crops (for example, Butternut squash).
Attention! Seedlings grown from hardened seeds are less sensitive to temperature extremes.
The material is quenched in the refrigerator for 3-5 days. Sprouted seeds in the same damp cloth or in sawdust are placed on the bottom shelf of the refrigerator.
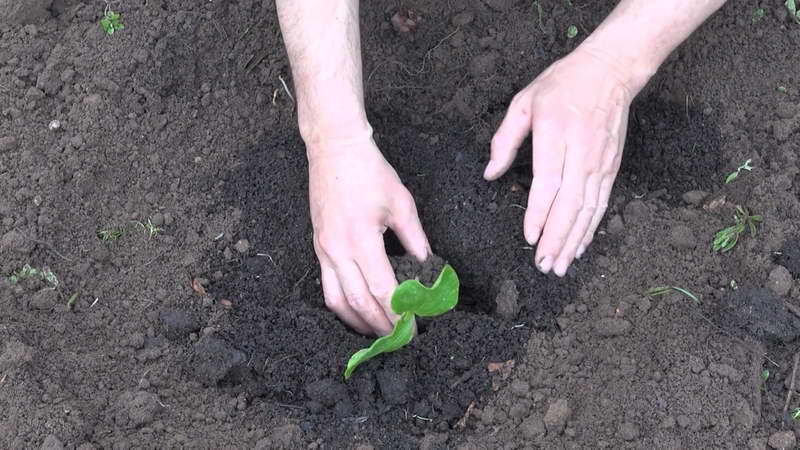
The hatched and hardened seeds are planted in prepared and moistened soil to a depth of 2-3 cm. In regions with a warm climate, the pumpkin is sown directly into the open ground: in barrels with compost or on the beds. In the Urals and in Siberia, the vegetable is mainly grown through seedlings.
Planting tanks and soil
Individual containers are chosen, since the leaves and stems of young plants are delicate and easily damaged during transportation and transplantation.
In addition, the culture does not tolerate picks, so special peat pots are perfect for it. Disposable plastic cups or other convenient containers can also be used. The diameter of each should be at least 8-10 cm, the depth - about 15 cm.
Important! Pumpkin seedlings do not like transplanting. Therefore, for growing seeds, they choose a container in which the plants will grow comfortably for 3-4 weeks.
Like any vegetable crop, pumpkin loves nutritious soil. Heavy soil with a predominant clay content will not work. The land is prepared independently or special soil mixtures are used for pumpkin crops (cucumbers, zucchini, squash, melons, watermelons).
At home, the soil is prepared from peat, humus and sand. They are mixed in a 2: 1: 1 ratio. Sea sand is not used, as salt is detrimental to the root system of plants. Sand is sometimes replaced with rotted sawdust. In this case, the ingredients are mixed in equal parts. Prepared planting containers are filled with soil mixture by 2/3.
Council. When filling containers, leave a small supply of soil. It will come in handy in the future for sprinkling elongated stems.
Sowing dates for seedlings in the Urals, Siberia and the Leningrad Region
When and how to plant a pumpkin in open ground in different regions of the country? To obtain strong and healthy plants, it is first of all important to correctly calculate the timing of planting seeds. A crop planted too early will stretch out and be difficult to transplant into open ground without damage. Late planting is also impractical - the seedlings adapt worse.
Germination of the material begins 3 weeks before the formation of stable warm weather. Pumpkin does not tolerate cold weather and frost, therefore, until the average daily temperature of + 13 ... + 14 ° C is established, plants are not planted in open ground.
Important! Overgrown seedlings, which are more than 1 month old, take root worse than younger ones.
In the Leningrad Region, suitable weather is usually established in the last days of May. In the Urals and Siberia - in the first half of June. Accordingly, the prepared seeds are planted in late April to mid-May. After 3-4 weeks, the matured plants will be ready to be transplanted into a garden bed or into a barrel filled with compost.
Pumpkin seedling care
By the time of planting, properly prepared plants have several true leaves of a rich green color and a strong, upright trunk. To grow a crop, you need to properly care for it: provide sufficient lighting, apply top dressing and observe the watering regime.
Pumpkin is light-requiring: deficiencies in sunlight weakens plants, the stems of which are stretched, and the leaves turn yellow. Therefore, containers with sprouts are placed on the south side of the house. If this is not possible, then phytolamps are installed.
The grown bushes are placed at a sufficient distance from each other so that there are no shaded plants.
Watering
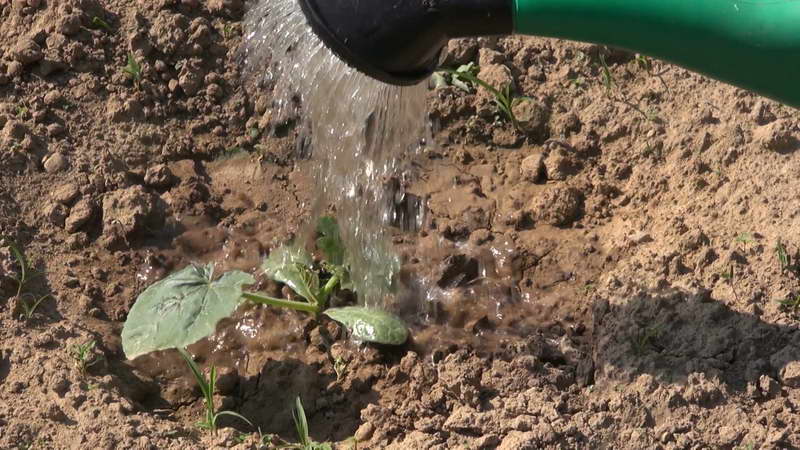
Pumpkin seedlings are watered regularly, but in moderation. It is important not to allow the soil to dry out before sprouts appear, otherwise the crops will die.
Excess moisture is just as destructive to seedlings as lack of moisture. Excessive watering is dangerous by stretching and thinning the stems. Stagnant water leads to rotting seeds, the development of fungal diseases.
Water the plants in the morning with warm, settled water. This makes it possible not to overcool the roots of a heat-loving culture. A week before the planned planting in open ground, watering is stopped, and 1-2 days before the soil is abundantly moistened and fertilized.
Important! Short, sturdy stems with small internode spacing indicate proper care. The bushes are ready for transplantation to a permanent place when 3-4 true leaves have formed in the shoots.
Top dressing
A week after the emergence of seedlings, the seedlings are fed for the first time. Nitrogen fertilizers are applied first... Experienced gardeners recommend fertilizing delicate pumpkin plants with a weak infusion of liquid mullein. It is diluted with water in a ratio of 1:10 and watered at the rate of 0.1-0.2 liters per sprout. As a top dressing, a 1.5% aqueous solution of nitrophoska is well suited (1 glass per 20 cm2 land).
The second time, fertilizers are applied a couple of days before planting the bushes in open ground. This time they are fed with nitrophos or any complex mineral fertilizer. The dosage for each plant is increased by 1.5 times.
When applying fertilizers, it is important to accurately observe their amount so as not to overfeed the sprouts. An excess of nutrients leads to the opposite result - the culture stops growing.
Temperature regime
The correct temperature regime for pumpkin plantings avoids crop problems.
Until the shoots appear, the containers are covered with foil and left in a warm place at a daytime temperature of + 20 ... + 25 ° C. The air can be 5–7 ° C cooler at night.
After the sprouts appear (on average, after 3-4 days), the daytime temperature is lowered to + 15 ... + 17 ° C, and the nighttime temperature - to + 12 ... + 13 ° C. If this is not done, the sprouts will stretch out, and it will no longer be possible to correct the situation. After a week, the pumpkin begins to develop true leaves. During this period, the temperature is again increased to + 18 ... + 22 ° C during the day and up to + 13 ... + 15 ° C at night.
Read also:
How to store a pumpkin correctly: different ways and secrets.
How to make pumpkin juice through a juicer for the winter.
We set yield records by growing the “Hundred-Pound” pumpkin variety on our site.
Possible growing problems
In the process of growing pumpkin seedlings, gardeners often face problems that are fraught with loss of harvest. What difficulties lie in wait for the germs of culture?
Seeds do not germinate or do not germinate well
The reason lies in the seeds themselves (for example, they have expired) or in improper care (from excess moisture, the grains rot and do not germinate). The only way out is to take into account the mistakes and sow again.
Seedlings are pulled
Pulling and thinning of plants is perhaps the most common problem that occurs after sprouting. Small pulling is easy to eliminate. For this, the remaining free space in the pots is covered with earth. The culture puts down additional lateral roots and stops excess growth. Such seedlings will be more robust due to the developed root system.
Another reason for stretching is lack of sunlight. Therefore, the plants are provided with artificial lighting.
Even highly elongated seedlings can be saved. To do this, the stem is gently grasped at the base, folded into a ring and covered with earth on top. As a result, lateral roots are formed and the vegetable grows stronger.
Seedlings die
Waterlogging of the soil in containers with seedlings leads to the development of fungal diseases and mold. One of these diseases is black leg. The disease can completely destroy the culture. It manifests itself in the form of blackening and decay of the root collar (see photo).
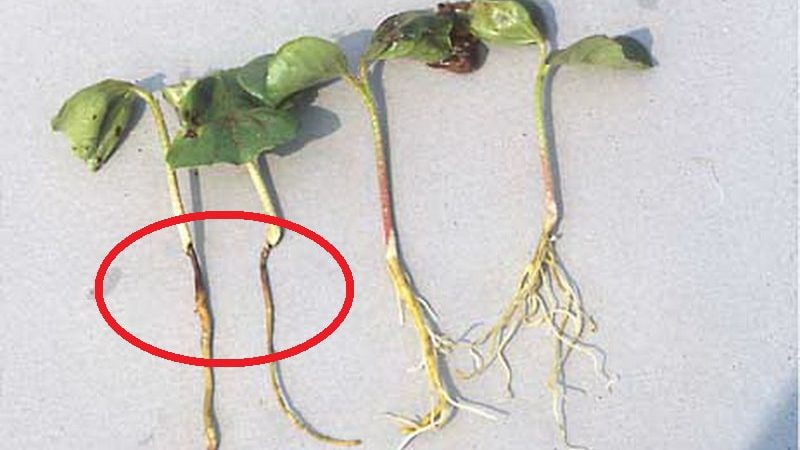
The source of the infection is hidden in the soil or seed. In addition, thickened crops, excessive moisture in the soil, insufficient ventilation, and sudden changes in temperature and humidity contribute to the development of blackleg.
The disease develops rapidly at high temperatures and insufficient ventilation of the room. This is especially true if the seedlings are grown in a greenhouse.
The choice of disease-resistant varieties and soil disinfection will help prevent the problem. For disinfection, the soil is calcined in the oven or frozen for 2-3 months.
Conclusion
Growing pumpkin seedlings at home allows you to accelerate the ripening of the crop by 2-3 weeks. To obtain a strong and healthy culture, seed is properly prepared, planting dates are calculated and the subtleties of caring for sprouts are observed.
It is important to transplant vegetables to a permanent place in a timely manner, since overgrown plants are easily damaged, and they take root less well.