Step-by-step instructions for grafting grapes in autumn
Grafting of grapes is an agrotechnical procedure that allows you to improve the properties of a plant and berries, restore a bush or replace one variety with another. There are many ways to inoculate a culture, which differ in principles and deadlines, but more often such an event is held in the fall.
Read on for the benefits and methods of grape grafting in autumn.
The content of the article
Why plant grapes in the fall
The plant is more often grafted before winter, although spring and summer grafting is practiced. The main reason for carrying out the procedure at this particular time of the year is the desire to get an early harvest next season.
Advantages and Disadvantages of Fall Vaccination
A few more benefits:
- the culture becomes more resistant to drought, high humidity, soil salinization, as well as to grape aphids - phylloxera;
- the event increases productivity;
- the size and number of berries on the bunches increases;
- if the propagation material is selected correctly, the ripening period of the bunches decreases;
- grape bushes become compact when two shafts are planted on the stock at once;
- the old bush is rejuvenated - the lifespan and fruiting increases.
Disadvantages of grafted seedlings:
- low yield of grafted standard seedlings from a school, rarely more than 50%;
- a large number of poor-quality accretion of scion and rootstock (incomplete or one-sided);
- possible attacks of bushes due to rejection of the scion;
- bushes damaged by frost do not recover due to growing rootstock growth;
- the fragility of grafted plantings - they often break down when they are laid on the ground with shelter for the winter.
Grafted seedlings are more capricious than self-rooted ones, and need more careful care, but the result in the form of increased productivity and crop stability is justified.
Terms of the procedure
In autumn, the optimal time for grape breeding is the end of the growing season, that is, October or early November. Then it is still warm enough, the air temperature is kept within + 15 ° С, and the soil temperature is not less than + 10 ° С.
Important! Grafting of grapes is carried out with a margin of 2-3 weeks before the onset of frost.
Objectives
Tinting improves the quality of the vine by combining the best qualities of the scion plant and the rootstock bush.
Graft growers use grafting for different purposes:
- Replace the variety with a new one without planting a seedling, using the already developed root system.
- Without uprooting a bush that does not give new shoots (due to freezing, damping, damage by rodents, etc.), restore the green mass in two seasons.
- Rapidly propagate rare or expensive varieties.
- Reduce susceptibility to disease.
- Increase the frost resistance of grapes using cold-resistant rootstocks.
- To increase the tolerance of some varieties of unsuitable soils - too acidic, calcareous, arid or, on the contrary, with a high level of groundwater.
- Grafting several stems of different varieties to one stock at once - this not only saves space, but also decorates the vineyards, in which clusters of different color and shape will appear.
- Improve the flavor and appearance of berries: certain combinations of rootstock and cuttings can influence the flavor and size of the grapes.
Scion and rootstock preparation
When preparing the mother bush for the procedure, it is carefully cut off.Leave only a stem 8-12 cm high. The cut should be clean from rot, signs of other diseases, traces of insect damage. The stem is cleaned of bark, dust, dirt and treated with a 1% solution of copper sulfate, after which it is touched only with sterile instruments. The cut of the stem must be even and smooth.
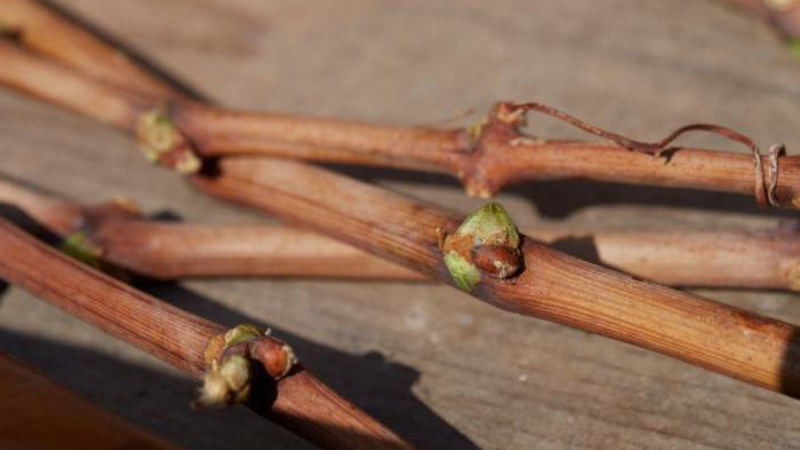
For high-quality grafting of any variety, cuttings must be properly prepared. They are harvested in late October or early November, taking into account the following recommendations:
- The event is held before the start of frost.
- Choose a healthy, high-yielding shrub carefully. The vine on it should be mature, have a tough yellow-brown bark.
- The scion shanks are cut with a length of 10-20 cm.
- On each of them, 2-3 eyes are left, carefully cleaning them from the mustache and stepsons.
- Then the shanks are kept in a solution of heteroauxin - a growth stimulator (0.1 g per 1 liter of water) for 24 hours.
- Then it is dried and treated with paraffin. It protects the cutting from drying out, improves its survival rate. Chubuki are dipped in melted paraffin for a few seconds and then quickly dipped in cold water.
- If the grafting procedure is planned for the winter or spring, the scions are stored in a pit, sprinkled with sand or in a refrigerator at a temperature not higher than + 5 ° C.
To obtain quality grafting material, do not use the top of the vine, or damaged, thin or crooked stems.
How to plant grapes correctly
In the autumn, the plant is often grafted into a split bole on the bush that has been giving a poor harvest in recent years. The success of the procedure depends on the correct execution of the splitting and preparation of the shafts.
Description of different ways
For autumn, the most effective method is grafting a bush into the stem. The stem is a small part of the trunk (up to 15 cm) located above the root above the ground. This method is used in cases where the formation of its own root system in the scion is not required.
The procedure begins with the preparation of the instrument. You will need a sharp knife and pruner disinfected in potassium permanganate or alcohol. After processing, they must not be placed on the ground. You will also need a hammer, bandage, twine and copper sulfate.
Then everything is done according to the following algorithm:
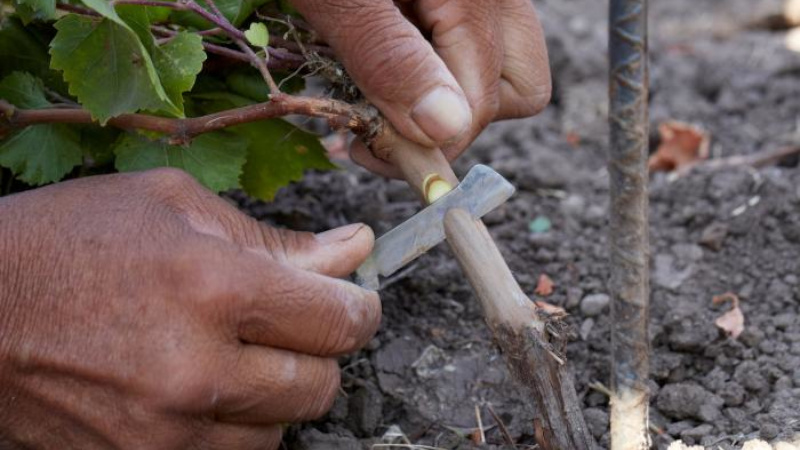
- The shanks are cut from the bottom of the stem at an acute angle.
- The same cut is made on the other side of the cutting. The result is a two-sided pointed end in the form of a wedge 2-4 cm long at a distance of 1-1.5 cm from the lower kidney.
- The cuttings are immediately immersed in water with the cut side. Do not touch the slices with your hands.
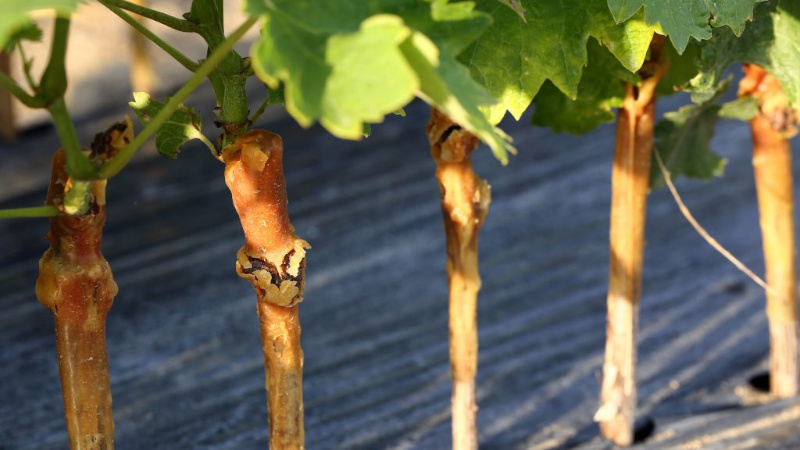
- In the trunk, a split is made with an ax, the depth of which corresponds to the length of the cut part of the scion cuttings. In other cases, the splitting is performed differently: a screwdriver is placed in the center of the saw cut and driven in with a hammer to the required depth.
- The stalk is inserted into the hole so that the lower bud remains outside, and the cambial layers of the scion and rootstock are superimposed on each other.
- If the stock has a large diameter, then another shank is usually inserted into it. The remaining space is clogged with toilet paper, previously soaked in water.
- The rootstock with the scion is tightly attracted with a bandage, elastic film or strips of fabric.
- Additionally, the vaccination site is fixed with twine.
- To preserve moisture and protect from frost, the grafting site is additionally covered with clay and wrapped in cloth.
- Then the soil of the near-root circle is loosened and watered.
- After the water goes into the ground, the bole of the bush is sprinkled with earth so that the grafting sites remain above the surface.
- As a covering material, a five-liter bottle with a cut-off neck is taken and installed upside down on a bole with a graft.
With the onset of spring, the shelter is removed gradually. If the weather is warm, raise the container for several hours and then put it back. So, within a month the plant adapts to new conditions and then the shelter is removed completely.
Even in the autumn period, the grafting is done at the root. In this case, the stem is underground. The maximum depth is 10 cm. The only difference is the height at which the connection is made. The procedure is as follows:
- Around the trunk of the bush, the soil is removed to a depth of 15-20 cm, and the underground part of it is cleared of the old bark.
- The cornétamb is cut down 6-8 cm above the upper knot.
- Then split to a depth of 5-6 cm and insert one or two cuttings sharpened on both sides with the buds outward.
- The cracks and the place of inoculation are covered with clay, wrapped with a cloth or film and carefully covered with soil 6-7 cm above the buds of the scion.
- Then it is well watered and covered with new soil on top. For the winter period, the grafted plant is covered with hay or straw, and covered with spruce branches on top.
Grafting green to green is the fastest and easiest way that does not need any preliminary preparation. After cutting the shanks, they are immediately grafted onto the bush. Usually copulation method is used when the scion and rootstock have the same thickness.
The main condition is to complete the procedure as quickly as possible so that the sections do not have time to dry out. To reduce the amount of evaporated moisture, the leaves cut off half.
The butt is a suitable grafting method for warm regions with insufficient moisture levels. The procedure is also simple. A part of the bark with a bud is removed from the selected scion and applied to the same cut made on the stock. The better the cut pieces match in size, the better the fusion quality.... If, after a few weeks, the grafted stalk gave a swollen bud, then the technology was correct.
Copulation is a more complex, but most reliable method. The thickness of the scion and rootstock should be the same for better alignment of the cambium layers.
Important! Whichever method of grafting is used, the task of the gardener is to ensure a tight fit of the cuttings to the stock, then there will be more chances that parts of the culture will take root safely.
Mistakes to Avoid
Sometimes cuttings do not take root due to mistakes that were made during the grafting procedure. The most common ones are:
- Different periods of ripening and vigor of growth in the stock and cuttings.
- Cleft too deep. Moist air enters the wide gap, which causes rot.
- The cut was made with a blunt instrument, so it turned out to be rough and bacteria formed on it.
- The cuttings were not treated with paraffin, as a result they lost a large amount of moisture, dried out and did not take root.
- The juice flows out abundantly from the plant, therefore the grafting site is too tight. This negatively affects the survival of the cutting.
Further care of grafted grapes
With proper care of the grafted grapes, already in the next season, you can get a rich and tasty harvest from a new bush.
To do this, experienced gardeners perform the following steps:
- A protection is installed over the young plant. The best option is a plastic bottle with a cut-off bottom.
- The grafted grapes are regularly watered and spud. Do not allow both drying out and waterlogging of the soil.
- Observe the plant. If after two weeks young shoots do not appear on the grafted cuttings, they are re-grafted.
- Autumn plant fed up phosphorus-potassium mineral fertilizers.
- In the spring, the shelter is removed, the soil around the bush is loosened. Feeding is carried out with organic or complex mineral fertilizers with a predominance of the nitrogen component.
It is interesting:
Proven ways to keep grapes for the winter at home.
How and when to open grapes after wintering.
When and how to properly transplant grapes to another place in the fall.
Conclusion
If you take the vaccination process responsibly and follow the instructions, you will definitely achieve the desired result.Grafting makes the plant more resistant to external factors and increases yields. The main thing is to provide the plant with optimal conditions and proper care after grafting.