How to properly grow radishes on a windowsill in winter: step-by-step instructions and useful tips
In winter, vitamin deficiency does not spare anyone, and sometimes you just want a fresh crunch of radishes or cucumbers. It would seem what is easier: natural vitamins can be bought in the store all year round. But the environmental friendliness of vegetables out of season is questionable. Many townspeople spare no time, effort, or space to get healthy food, even at home. Small vegetables are easy to grow in an apartment.
In this article we will tell you how to grow radishes on a windowsill in winter, we will help choose a variety and create the right conditions.
The content of the article
Radish varieties suitable for growing at home
For growing radishes at home, ultra-early or early ripening varieties are suitable, since they do not require special attention and are easily adapted to non-standard conditions. These include:
- Heat. A hybrid with a ripening period of 25-27 days. Differs in delicate root vegetables with a sweet taste.
- Firstborn. Ultra-early hybrid with high yield. Fruit weight - 30-35 g. Ties roots in any conditions, resistant to shooting.
- Cherriet. A hybrid of Japanese selection. Does not shoot and practically does not get sick. Despite the fact that ripening occurs only on the 30th day, the culture does not require increased attention and takes root well in any conditions.
- Camelot. The ripening period is early, fruiting occurs on the 23-25th day. Ripe vegetables of a round, slightly flattened shape with excellent taste. Fruiting does not depend on light. The fruits do not lose their appearance and taste even in the shade.
- Champion. An early ripe variety, demanding for light. Fruits are round-elongated, weighing up to 20 g. Excellent taste. Radish goes well with other vegetables. Marketable condition keeps long time, resistant to wilting.
- 18 days. Ultra early ripening variety with high yields. This is a real storehouse of vitamins. Elongated vegetables with juicy, tender, without bitterness pulp.
- French breakfast. Early maturing large-fruited culture. Ripe vegetables weigh 40-45 g. Taste without pungency, juicy, tender pulp. The shape of vegetables is elongated, not like the usual one.
What is needed for growing
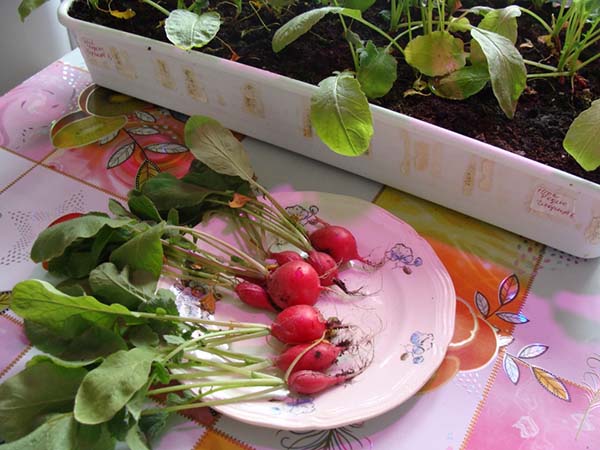
First of all, for the cultivation of radishes in the winter at home on a balcony or windowsill, you need a great desire to get a good harvest. Next, we choose a suitable planting capacity and make high-quality soil, from which the seedlings will receive all the nutrients necessary for growth.
Materials and inventory
You can grow radishes at home not only in winter, but all year round. To do this, it is enough to choose the appropriate inventory and competently prepare seed to sowing.
Suitable containers:
- an ordinary wooden box;
- Plastic container;
- paper or plastic cups.
It should be clarified that a single planting will relieve the seedlings from thickening in the future, which reduces the risk of spreading fungal infections. In addition, the sprouts receive nutrients fully and evenly.
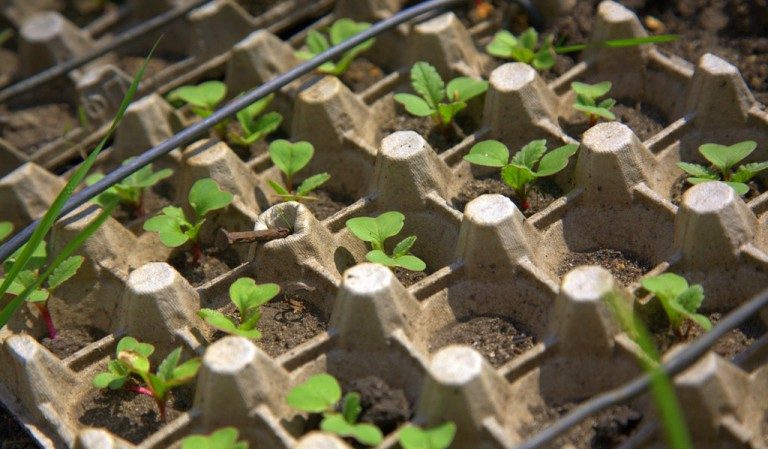
The method of growing radish in egg cassettes deserves special attention. This technology is budgetary and simple, nothing interferes with the growth of seedlings, which do not need to be thinned out in the future.
To obtain nutritious soil, garden soil, humus and washed river sand are mixed in equal quantities. Radish loves a light and fertile substrate. For ease, sand is added, and humus saturates the earth with additional nutrition.
Reference. According to the rules of crop rotation, the land on which potatoes or cucumbers previously grew is suitable for radish. The land where crops from the cruciferous family grew (cabbage, radish, radish) should not be taken.
You can also buy soil for sowing at any gardening store. As a rule, such land is already prepared for sowing and does not require additional fertilizing and disinfection.
Optimal conditions
So how do you grow radishes on a windowsill in winter? It is necessary to create conditions suitable for growth:
- maintain a comfortable temperature;
- provide lighting;
- prepare light and fertile soil;
- maintain optimal soil moisture;
- prepare a convenient container.
When these conditions are met, a rich harvest is guaranteed for healthy growth.
Training
The basic ingredients for success are creating an optimal microclimate and competent preparation for sowing. The speed of germination and healthy growth of seedlings depend on the pre-sowing preparation.
Seed material
By purchasing seeds in specialized stores, you can be sure that they have been disinfected and treated with additional nutrients for quick germination.
All that remains is to germinate the grains and sow those that will sprout.
Put a cotton pad or a piece of gauze moistened with warm water into a small container, place the seeds on it and cover it with the same moistened gauze piece.
To prevent moisture from evaporating, cover the container and leave it for 2-3 days. Until the grains germinate, be sure to check the moisture content of the gauze. When dry, moisten with warm water.
Soil and containers
The soil is needed light, loose, fertile and non-acidic. You can prepare the substrate yourself from garden soil, river sand and humus, mixed in equal amounts. The finished mixture is spilled with a hot solution of dark potassium permanganate to destroy the pathogenic flora.
Also, the disinfecting function is performed by the "Fitosporin" solution. It belongs to contact fungicides, which are used for the prevention and treatment of plants against fungal diseases. For greater fertility, a full range of minerals is introduced into the ground, so as not to feed the seedlings in the future.
The capacity is chosen general or individual. A wooden box is suitable from the general container, and plastic or paper cups, a plastic container or egg cassettes are suitable as separate containers.
Whichever container you choose, make small drainage holes at the bottom to drain excess water. Stagnant moisture increases the risk of developing fungal diseases, especially blackleg.
Planting containers, like the soil, are treated with a dark-colored manganese solution. The disinfected containers are filled with earth and slightly moistened with warm water from a spray bottle.
How to properly plant a radish at home
The home planting procedure is practically no different from growing on the site. First, we fill the planting containers with soil. We fill the earth by two-thirds, so that in the future, as the seedlings grow, it will be possible to fill up the soil. This method provides additional plant nutrition throughout the growing season.
We moisten the soil with warm water and sow the seeds to a depth of 1.5 cm with a distance of 5-6 cm from each other. Sprinkle on top with earth or peat and moisten with warm water from a spray bottle. Cover the containers with foil and leave them in a dark room at a temperature of at least + 16 ° C.
Reference. At temperatures below + 16 ° C, the seeds will rot in the ground.
How to care for radishes
Radish is an unpretentious culture. Under optimal conditions, it does not require special attention.
Watering and feeding
Water as the top soil layer dries up. Do not flood the plantings, as excess moisture will provoke root rot and the spread of fungal diseases. Pour warm, settled water from a shallow watering can.
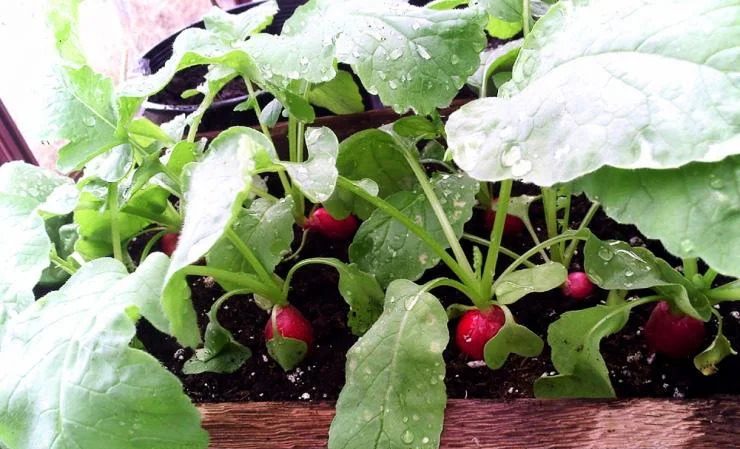 During the formation of fruits, we water more often and more abundantly so that the roots gain mass. We stop watering a week before the end of the growing season.
Due to the short development period, we do not feed the plants. They have enough nutrients introduced into the soil before planting.
Lighting
Radish is not demanding for long daylight hours, ten-hour lighting is quite enough for it. Do not forget that with an excess of lighting, the culture begins to shoot, that is, to form not roots, but flowers. Lack of light also negatively affects the plant - the seedlings stretch out.
In winter, radishes on the windowsill require additional lighting. To do this, install phytolamps.
For full development, the optimal daytime temperature should not exceed + 20 ° С, while the nighttime temperature should be reduced to 10 ° С. It should be remembered that at the initial stage of growth, the temperature is always lower than during further development.
Reference. High temperatures (above + 23 ° C) are detrimental to radishes - they form greens instead of fruits.
Thinning
Thinning is carried out in the event that the sowing was carried out in a common container. When the plants have two true leaves, we remove the weak seedlings so that they do not interfere with the champions. We maintain the distance between the plants at least 5 cm.
Disease and pest control
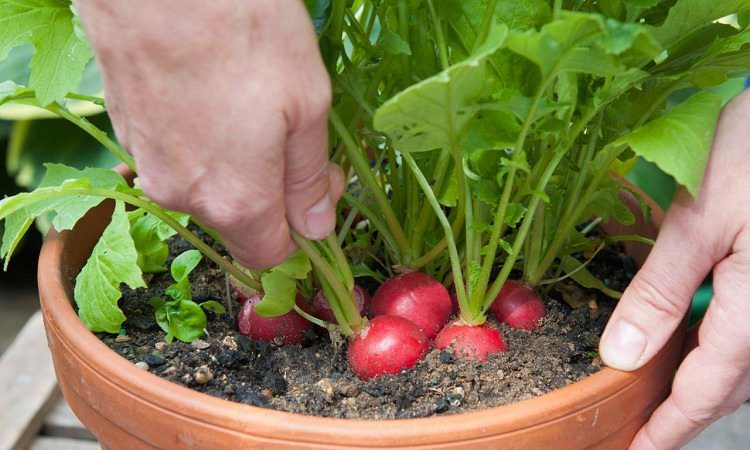
Excessive and untimely watering can cause fungal infections... One of the most dangerous is the black leg. This is the collective name for many diseases that are characterized by darkening of the lower part of the stem (near the ground). In the future, root decay occurs, and the plants die. The black leg spreads quickly and destroys all plantings.
It is not easy to cure a black leg, but you can protect the seedlings by disinfecting the soil with a solution of potassium permanganate. In case of seedlings disease, watering is immediately stopped and moistened with a solution of potassium permanganate.
For obvious reasons, indoor plants are the least susceptible to attack by insect pests. Nevertheless, the radishes grown in the apartment are sprayed with Fitosporin once to strengthen the immune system and destroy fungal spores.
Reference. "Fitosporin" is a contact fungicide that has a preventive and curative function in the fight against infections.
Harvesting and application of the crop
For full ripening in the garden, one variety is enough for 18 days, while the other pleases with a harvest only after three weeks. But at home, the ripening time of root crops is slightly postponed. It is difficult to unequivocally answer the question of how long it takes to grow radishes at home.
The growing season is short, no more than 25-28 days (if we are not talking about late varieties). The final growing season depends on the growing conditions. It is important not to miss the full ripeness, otherwise, when overgrowing, the peel will begin to coarse, and the root crop will crack.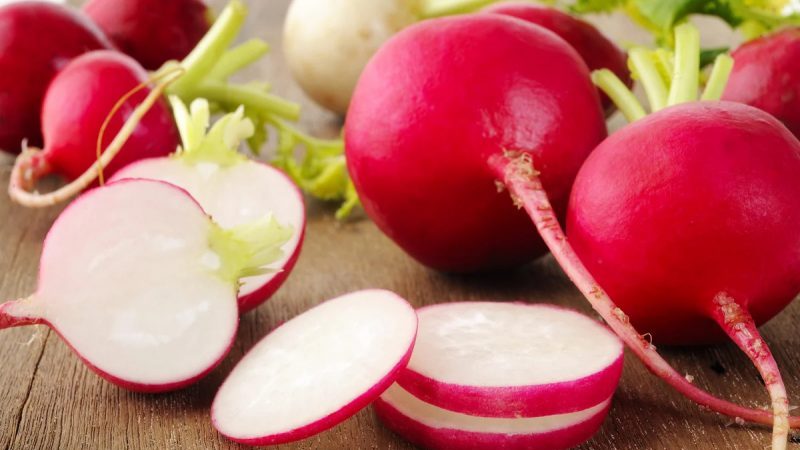
Of course, you cannot grow radishes in large quantities in an apartment. Therefore, the harvested crop is used on the personal farm for the preparation of all kinds of dishes.
Tips on the topic
A few tips to help you care for your homemade radish:
- Despite the presence of artificial lighting, culture needs natural light. That is why plants are displayed on a windowsill or balcony.
- Radish grows better in cool weather than in hot weather.
- When growing in egg cassettes, a hole must be cut at the bottom of each cell and the container must be buried in a box of soil. Otherwise, the growing seedlings will not have enough space for the development of the root system.
- Water only with warm, settled or filtered water.
- After watering, loosen the soil, ensuring the air permeability of the soil.
- Thin seedlings if they landed in a common container.
- Observe temperature and humidity levels.
The fulfillment of these conditions will ensure a healthy, rich harvest.
Read also:
A productive and not picky in care variety of Duro radish.
Unusual-looking and pleasant-tasting watermelon radish: what is good and how to grow it.
Sora radish, which is early ripening and very popular among summer residents.
Conclusion
Having considered all the nuances of growing radishes in an apartment, you can safely proceed to winter sowing. The main thing is not to forget about lighting, temperature conditions, competent watering and thinning of seedlings. Then the plant will surely delight you with juicy and crunchy roots.