Step-by-step instructions for planting stalked celery seedlings
Planting stalked celery for seedlings is the most reliable way to get large, juicy and tasty stems. The long growing season dictates its own rules: in the climatic conditions of Russia, it is difficult to grow a rich harvest without first germinating seeds and preparing seedlings at home. Even in a warm southern climate, it is not always possible to wait for ripe petioles before the onset of frost.
In this material we will talk about the nuances of growing seedlings, caring for it and the rules for transferring into open ground.
The content of the article
Features of stalked celery
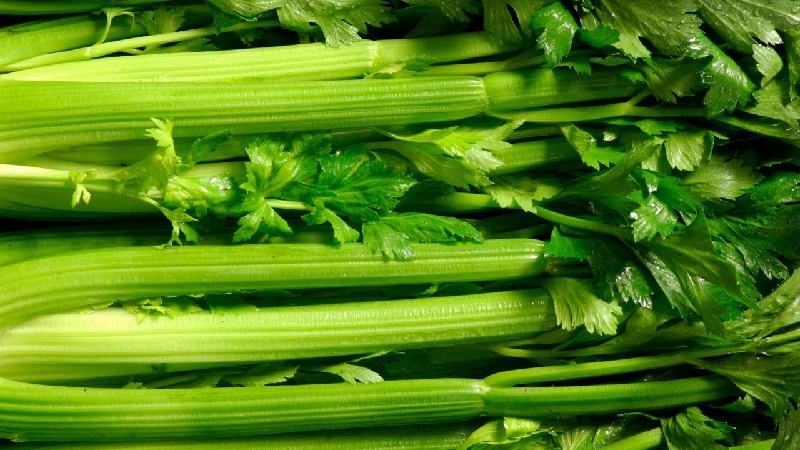
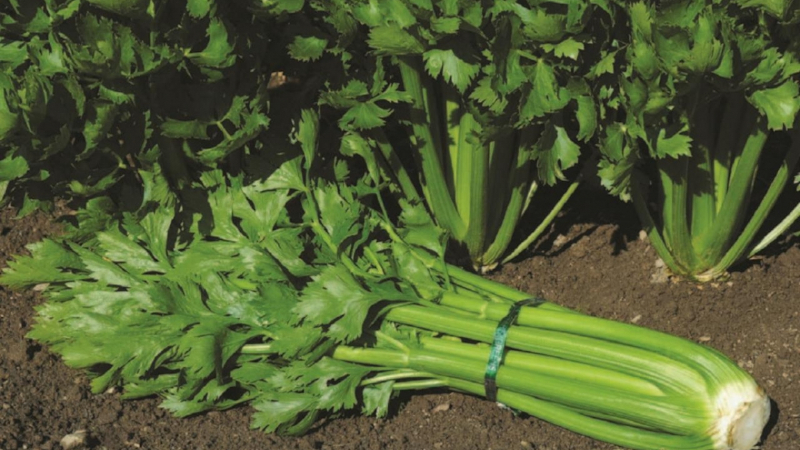
Petiole celery is a biennial plant from the Umbrella family. Culture native to the Mediterranean... Thick and juicy stems of green, red, pink and white are used for food. Most valued are bleached petioles, which have a sweetish taste without bitterness. Celery varieties with red petioles are frost-resistant down to -5 ° C, so the harvest is harvested until late autumn.
In the first year, the plant forms thick stems about 1 m high and greenery. In the second year, it produces arrows with peduncles and seeds.
The growing season of stalked celery is 80–180 days, depending on the variety.
Celery stalks are rich in easily digestible carbohydrates, vitamins, mineral salts, trace elements, and aromatic compounds. Regular use of the product has a beneficial effect on metabolism and nervous system... The petioles are used fresh, stewed, boiled in salads, side dishes, soups and as an independent dish. In China, desserts are made from them.
Sowing dates of seedlings
When choosing the timing of sowing stalked celery for seedlings, experienced gardeners are guided by the phases of the moon.
Optimal days for sowing according to the lunar calendar in 2020:
- in February: 10-15, 17-20, 24, 25;
- in March: 3-6, 17, 18, 22, 27-30;
- in April: 5-7, 10-14, 18, 19, 23, 25-29;
- in May: 2-6, 15-17, 24-26, 30-31.
Given the diversity of climatic zones in our country, when growing seedlings of stalk celery, it is equally important to take into account the weather conditions of each individual region:
- in the north, sowing work is carried out in the last decade of March - the first decade of April;
- in the regions of the middle lane - all March;
- in the south - from mid-February to early March.
Preparing for landing
When growing seedlings of stalked celery, germination of seeds, preparation of soil mixture and containers, and creation of favorable conditions in the room play an important role.
Seeds
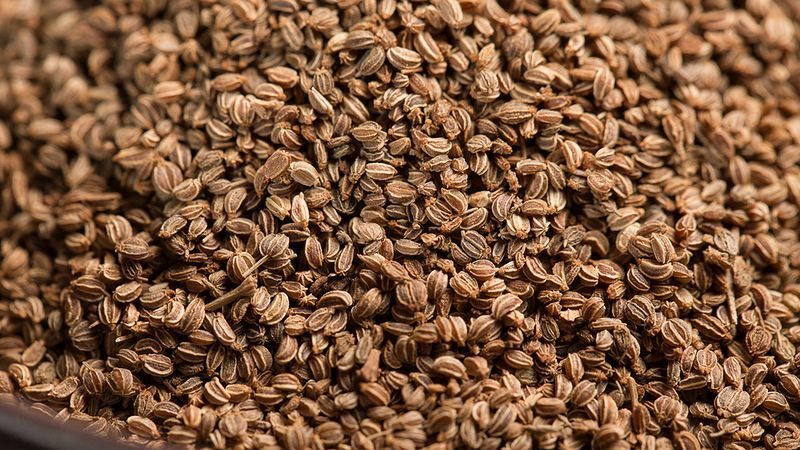
The seed coat contains a large amount of essential oils that reduce the percentage of germination. Therefore, stalked celery is preferably grown through seedlings. Direct sowing in open ground is carried out with complete confidence in the quality of the seed and its freshness. It happens that producers indicate inaccurate information about the expiration date, and the buyer runs the risk of purchasing expired seeds that will not germinate.
For safety reasons, it is recommended to germinate the seeds: soak in warm water for 3-4 hours, wrap in a damp cloth and leave at room temperature until white seedlings appear. Sowing of germinated material is carried out in areas with early spring and long summer. In such conditions, it is highly likely to get early shoots and harvest before the cold weather.
Wet sawdust is used to germinate seeds. A clean glass or plastic tray is filled with wet sawdust, and seeds mixed with river sand are placed on top. Without closing the lid, the container is placed in a warm, lighted place. Sawdust is periodically sprayed with a spray gun to maintain constant humidity, waiting for the sprouts to appear.
There is another way to prepare seed material - stratification. The seeds are placed in a damp cloth and left at room temperature for a week. Then the cloth roll is placed in the refrigerator for 2 weeks. Thus, favorable conditions for germination are created, close to natural: the grains winter in the ground, and in spring they sprout together.
Seeds from well-known manufacturers are disinfected before packaging. Seeds collected by hand are subject to mandatory disinfection in a solution of potassium permanganate or "Fitosporin".
Council. To increase the percentage of germination, soak the seeds in a growth stimulator - "Epine" or "Zircon".
The soil

To grow celery seedlings, use a substrate from shops for gardeners or prepare the soil yourself from:
- equal parts of turf, sand, peat, sawdust and ground eggshell;
- peat, vermiculite and humus (3: 1: 1);
- peat, humus and wood ash (3: 1: 1);
- biohumus and sand in equal proportions.
Before use, the soil is disinfected in an oven, microwave oven, double boiler. However, when heated, not only pathogenic, but also useful microflora perishes, so farmers recommend watering the substrate with a dark solution of potassium permanganate, "Baikal-M" or "Shining".
To increase the nutritional value, 200 g of wood ash and 20 g of urea are added for every 10 kg of soil mixture.
Container and place of cultivation
For growing seedlings of stalked celery, plastic boxes, containers, trays, tetrapacks are used... The grown seedlings are seated in disposable glasses with a volume of 300 ml. Holes are made in the bottom to drain excess water.
Before use, containers are washed and disinfected with a solution of copper sulfate or potassium permanganate.
An ideal place for growing celery seedlings is a sunny windowsill. The duration of daylight hours should be at least 12 hours, optimally 16 hours. With a lack of sunlight, the seedlings are supplemented with a phytolamp.
How to plant stalked celery seedlings correctly
The prepared soil is poured abundantly with water at room temperature and laid out in boxes. With a toothpick, grooves are formed with a depth of 5 mm, watered with a syringe and carefully spread the germinated seeds, trying not to damage the sprouts. Once again pour water over and stretch a plastic wrap on top.
Some gardeners use snow instead of water. A layer of clean snow is spread on the substrate, and seeds are distributed on top. The melt water will "pull" the seeds along. As a result, natural conditions are created that are favorable for the growth of celery seedlings.
2 weeks after sowing, the seedlings are treated with Trichodermin solution to prevent fungal diseases.
Sowing seeds in a snail
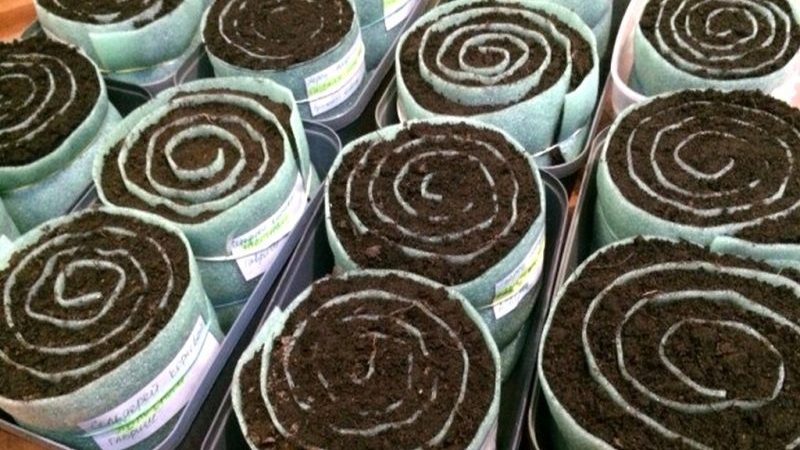
Agronomists recommend adopting a relatively new but proven method of growing stalked celery seedlings in snails. The method saves space on the windowsill - the snails are placed vertically in wide pots or wide plastic trays with low sides.
For curling snails, dense cellophane or a substrate for laying laminate is suitable. Elastic bands are used for fastening. A tape 10 cm wide is cut out of the substrate or cellophane, a centimeter layer of substrate 20 cm long is poured on top. The germinated seeds are carefully spread with tweezers at a distance of 1-2 cm, 2 cm away from the edge of the film.
The tape is carefully folded, then a layer of soil is poured over the remaining area and the seeds are again put. The snail is rolled up to the end, fixed with rubber bands and placed in trays or pots with the seeds facing up. A cellophane bag is pulled on top.
Further care
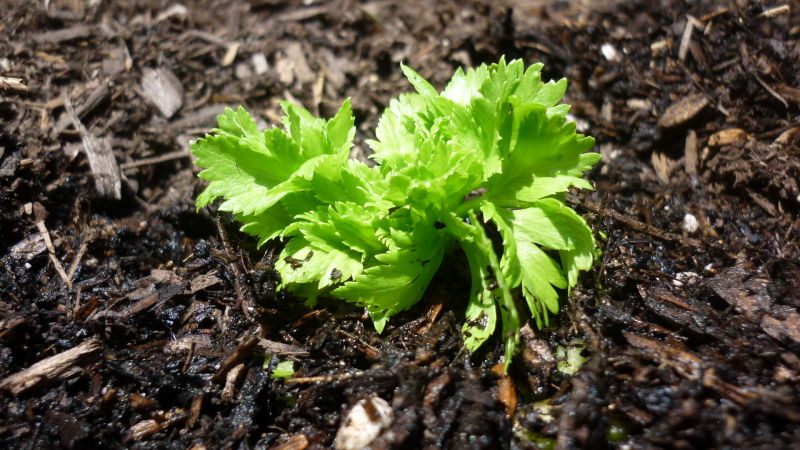
Until the sprouts appear, the container with seedlings is kept under a film cover in a dark room. The prepared seeds sprout in 14-15 days at a temperature of + 20 ... + 22 ° С. After the seedlings appear, the film is removed, and the containers are placed on the windowsill on the sunny side of the house.
After the appearance of cotyledon leaves, the air temperature is reduced to + 12 ° С, and after 10 days it is raised again to + 20 ... + 25 ° С. This is to prevent the seedlings from pulling out.
Seedlings with 2-3 true leaves are seated in a separate container, choosing strong and healthy specimens. Sprinkle seedlings with a teaspoon or a peg. The main root is pinched to ensure sufficient nutrition for the terrestrial part of the plant and the formation of a network of lateral roots. This procedure is called diving.
Charcoal is placed at the bottom of the container for drainage, 2-2.5 cm depressions are formed in the soil and watered with a syringe. Each seedling is planted in a separate glass. A soil mixture or peat is poured on top, leaving the cotyledon leaves above the surface. Seedlings are watered with warm water mixed with Gumi fertilizer (6 drops per 1 liter).
Attention! Cold water is not used for irrigation. This leads to decay of the root system and the development of black leg disease.
After picking, the seedlings are kept in partial shade for 2-3 days, then taken out to a lighted place. Favorable conditions for the development of petioled celery seedlings are 12-16 hours of daylight hours and an air temperature of + 18 ... + 22 ° С.
Seedling care consists of several procedures:
- maintaining optimal soil moisture;
- watering through a sieve under the root;
- preventive treatment with "Fitosporin";
- loosening the soil to improve aeration of the roots;
- feeding every 14 days with chicken droppings (2 tsp for 5 liters of water);
- top dressing every 10 days "Nitrofoskoy" or "Superphosphate" (2 tsp for 5 liters);
- hardening of seedlings in the open air 2-3 weeks before transfer to open ground.
Planting ready-made seedlings in the ground
When to plant seedlings outdoors? The transfer of stalked celery begins as soon as the plant height reaches 20 cm. The best time for a transplant is late April or early May, depending on the region.
Attention! The optimal conditions for the growth and development of a crop are moderate air temperatures and sufficient soil moisture.
Suitable for growing light sandy loam soil, rich in organic matter, open sunny areas. The acidity of the soil should be neutral (pH = 6.8-7) or slightly acidic (pH = 5.6-6.0). Celery grows poorly on acidic soils. For deoxidation, dolomite flour, chalk, hydrated lime, and wood ash are added to the ground.
Planting is located where cabbage, potatoes, zucchini, cucumbers used to grow. In autumn, deep plowing is carried out, the soil is fertilized with humus, fermented food waste, and compost.
In the spring, re-plowing and loosening of the site is carried out, the soil is spilled with a strong solution of potassium permanganate or copper sulfate. Furrows are formed at a depth of 25-30 cm with an interval of 40 cm. The row spacing is 60 cm. Wood ash is placed on the bottom, a layer of soil is poured on top so that the level of the furrows is 8 cm below ground level.
The seedlings are carefully removed from the glasses and placed in the soil together with the earthy clod. Then the beds are mulched with sawdust or straw.
Landing is performed on a cloudy day. When planted early at the end of April, celery is covered with black agrofibre to protect it from frost.
Growing features
Rules for successful cultivation of stalked celery:
- Petiole celery loves moisture and, if it is lacking, begins to dry out. The stems become stiff. The optimal watering regime is 3 times a week.
- Loosening and weeding is carried out as necessary, preventing weeds from rooting. Treatments provide additional air flow to the root system. The formation of a dense earthen crust leads to a delay in plant growth, as a result, the petioles are hollow inside and tasteless.
- Side shoots are removed as they grow. How do you know which ones to remove and which ones to keep? Yellow, unkempt-looking thin stems are removed immediately, thick and strong ones are left.
- Petiolate celery is fed weekly, alternating between potash and nitrogen fertilizers: Superphosphate or Nitrofoska (25 g per 10 l), nettle infusion, biohumus, Shining biological product. Pale and yellowed leaves are fed with a urea solution (10 g per 2 l of water).
- 2 weeks before harvest, the petioles are bleached to obtain a delicate taste without bitterness - the stems are tied in bundles and wrapped in paper.
Read also:
Step-by-step guide to planting root celery seedlings.
Step by step instructions: how to grow celery from seeds at home.
What are the features of apple celery and why it is worth growing.
Conclusion
Growing stalked celery through seedlings is a promising way to obtain a rich harvest. The technology of germinating seeds and proper care of seedlings includes sufficient watering, feeding with potash and nitrogen fertilizers, creating a temperature and light regime of the day.
A special role is played by the choice of soil, careful planting of seedlings and further care: watering, mulching the beds, weeding and loosening, feeding, bleaching the petioles and removing the side stems. Comprehensive agrotechnical measures help to achieve maximum results.